

I grew up with preserved food as pantry staples, like most other prairie kids of my generation. I loved home canned chickens but my home economics course at university showed me that it was not a safe method of food preservation for meat.
A good alternative is pressure canning. Foods that benefit from a long cooking time like baked beans and chicken stock are ideal. Salt is not needed so it can work for special diets.
Pressure canning is the only way to take the temperature up to 240 F (115 C) and kill not only the bacteria but also the spores that cause botulism.
Read Also

Sustainable food has ‘lost all meaning’: prof
That marketing strategy is deader than a doornail, says a University of Guelph professor who specializes in consumer preferences and perceptions of agriculture and food.
A pressure cooker is not the same as a pressure canner and should not be used for canning. The canner allows for selective pressure control. There are three weights allowing the pot to process with pressure at five, 10 or 15 pounds per sq. inch (.35, .70 or 1.05 kg per cm).
The lid of the pot has a reusable overpressure plug, which releases if the inside pressure goes too high. There is also a spring safety device on the lid handle to prevent the pressurization of the canner before being closed.
A cooking rack keeps jars off the bottom of the pot and a second rack usually comes with the canner. Jars can be stacked and this rack is placed between the two layers.
In the middle of the lid, there is a vent tube where pressure control weights are placed to regulate the inside pressure of the pot. The lid has a rubber gasket that creates an airtight seal, allowing pressure to build up inside the pot.
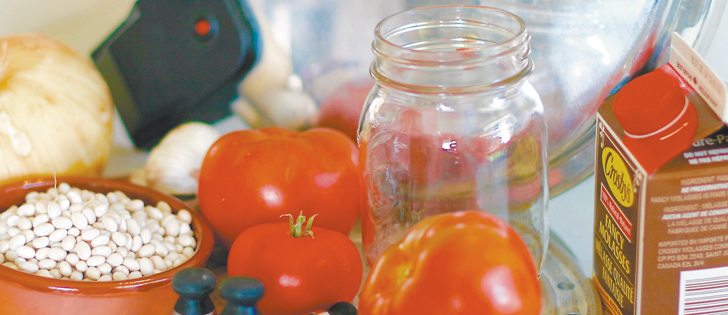
Start by checking canning jars for nicks and scratches and discard imperfect jars and screw bands. Always use a new lid.
Prepare jars and pack with food as you would for water bath canning. Pack tightly because it will shrink with cooking. Hot food can also be packed in the jar but should be packed loosely.
Use proper head space: 1/4 inch (.6 cm) for juices, jams and jellies, and relishes, 1/2 inch (1.2 cm) for fruits, tomatoes, and pickles, one to 11/2 inches (2.5 – 3.8 cm) for meat and vegetables. Too much head space results in a lower vacuum and a weak seal. Too little head space may force food under the lid, causing siphoning or breaking of the seal.
Read your instruction manual and add the suggested amount of water to the canner. It will be about three inches (7.6 cm). Close the lid properly by ensuring the grips on the lid are directly over grips on pan. The plastic that is used in the handle of the pressure canner is made from thermoset material that has a high melting point.
Heat on high with the pressure control weight off until steam comes out of the vent tube. Let steam vent for 10 minutes, and then place a pressure control weight on the vent tube. Use the weight recommended in the recipe. Keep an even heat and prevent drafts from blowing over the canner.
Process according to the time recommended in the pressure canner manual or a recipe source such as Bernardin. Begin the timing from when the control weight jiggles vigorously. When processing time is finished, turn off heat and let canner cool naturally.
Do not remove the pressure control weight or run under cold water. It will take up to an hour for a larger canner with a full load to cool. To test if the pressure is down, gently nudge the control weight. If steam spurts out, the pressure is not down.
When cool, remove lid then remove jars with a jar lifter. Do not set hot jars on a cold or wet surface because they may break. After 12 hours, remove screw bands and check the seal on jars.
After processing, remove the canner from heat and allow it to cool naturally until there is no pressure. Wait two minutes and remove the control weight pressure regulator. Wait 10 more minutes before removing lid.
Sarah Galvin is a home economist, teacher and farmers’ market vendor at Swift Current, Sask., and a member of Team Resources. She writes a blog at allourfingersinthepie.blogspot.ca. Contact: team@producer.com.