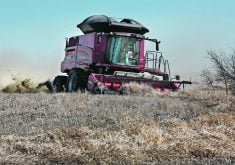
WINNIPEG – Novice combine operators and veterans of many dusty field campaigns could both find value in two computer courses that cover the gamut of combine operations.
The first CD, titled Fundamentals of the Combine, covers the entire range of combine types and brands.
It could be viewed as a basic primer on combine technology and it provides valuable information to novice combine operators.
For veteran operators, level 1 is a good refresher.
The second CD, entitled Theory of Combine Settings and Adjustments, walks students through the combine from header to spreader and explains the many adjustments possible to improve harvest performance.
Read Also

VIDEO: Ag in Motion documentary launches second season
The second season of the the Western Producer’s documentary series about Ag in Motion launched Oct. 8.
Together, the two CD courses, recently released by Case IH, form a training program for new operators and a good mental jog for experienced operators looking for those last few points of performance from their combines.
The courses include video animation of combine components in action, audio to match course content, photos, illustrations and test exercises.
Students can make adjustments, carry them out on the interactive program and see the results of their decisions on screen.
The kill stall technique, explained in the level 2 CD, is the only way to fully assess what’s happening inside a combine at every stage of the process, according to Case IH training specialist Dan Renaud. Cameras and monitors provide only limited information, he said.
“When you kill the engine while operating in a typical harvest condition, you capture all the crop material in the natural position,” said Renaud, who designed the course. “Everything within the combine is retained at the stage where it stops, so you can do a very accurate analysis of what’s going on at each point.”
Kill stall involves running the combine in a typical crop density with what you believe are the correct adjustments. The kill stall brings everything to an immediate halt, preventing any crop material from moving toward the back or from clearing out of the system.
Students then examine different components of the combine.
It works like this: at about 100 metres into a good, representative run of crop, kill the engine using the method prescribed in the operator’s manual.
Place the drive in neutral and disengage all header and threshing functions. Then immediately restart the engine and run it at a slow idle to cool.
Next, students should check several areas of the combine:
- The tank for grain damage, sample cleanliness and completeness of threshing.
- Behind the header for header losses.
- In front of the header for pre-harvest losses.
To see an animated version of the checking process, students can press the video button. Next, examine the inside of the machine and check:
- Distribution of material on the grain pan or auger bed.
- Distribution of material on the sieves.
- Type and amount of material on the returns.
The kill stall check should take about 15 minutes, said Renaud.
In addition to checking pre-harvest and header loss and functions within the combine, this is a good opportunity to count grain on the ground under and behind the combine. This information is vital in the lesson called determining and estimating grain loss.
What about the wisdom of an instant shutdown on a delicate machine like a combine? What are the risks of damage?
Renaud said Case IH has been using kill stall for more than 20 years, because it is the only way to identify problems.
“The same thing happens when your combine inadvertently swallows a plug and kills the engine. The difference is that a plug is an overload, so you know it’s hard on the machine. It kills because the operator is trying to work beyond the capacity of the machine.
“A deliberate kill stall takes place in an optimal harvest situation, not an overload. The combine should be working in a typical harvest environment, with a typical load. The impact on the combine is far less than a plug.”
He emphasizes that the operator must immediately disengage the drive, header and threshing mechanisms and restart the engine so it can cool gradually.
Once the engine has cooled, turn it off and proceed with the check.
“There is so much knowledge to be gained when you examine, for example, the rotor to see the kind of mat you have. You can study the separation you’re getting from the front to the back.
“You know that if you’re sitting with a bunch of kernels at the back of the rotor, then something isn’t working right closer to the front of the combine. The process isn’t happening quickly enough.”
Renaud recommended that serious operators conduct a kill stall at least once in every new crop and even every new variety.
Some operators who cannot tolerate grain on the ground repeat the process for each field.
“Once you’ve done enough kill stalls, made some adjustments, and then do more kill stalls to check your adjustments, you get to be pretty good at setting up the combine. The more you learn with each kill stall, the more knowledge you bring with you to subsequent fields and subsequent years.
“It takes about 15 minutes, but it’s time well invested.”
The section called determining and estimating loss demonstrates how to check for lost grain at each stage in the process.
A grain loss button on each screen of the computer lesson provides access to tables that give the bushel per acre loss at each stage. These tables cover all common crops and a wide range of yields.
The process begins by making a short pass in a typical field situation with the spreader turned off.
The operator stops and backs up one combine length, then turns the combine off and checks grain patterns on the ground.
The following seed counts should not be conducted next to the previously harvested strip, as it may contain stray seeds from the previous combine pass.
A – Pre-harvest loss is determined by counting seeds in a 10 sq. foot area just in front of the header. Clicking on the seed loss button opens the table, allowing students to calculate the loss for that target field.
B – Header loss is measured in a 10 sq. foot area directly behind the header position. To obtain the correct header loss number, subtract the pre-harvest number of seeds from the new total. The seed loss button provides access to the appropriate seed loss table.
C – The next screen in the exercise is leakage loss. This seed count is taken in a 10 sq. foot area immediately under the cleaning area and directly in front of the D sample area. The C will give you information on seed loss due to bad seals, warped doors and other open air leaks.
D – Students can also isolate separator losses. This 10 sq. foot sample must be taken in the area directly behind the cleaning system and in the same width as the cleaning system. The seed loss button also factors in header width.
The level 1 course looks at combine designs, such as single rotor, twin rotor, end-feed rotor, trans-axial rotor, conventional and super conventional, and it details how they differ. It includes all North American built combines.
This course looks at how a crop moves through a combine, covering the basic functions of feeding, threshing, separating and spreading.
Specific topics include cutting/gathering, crop feeding, crop transition, threshing, separating, conveyance, cleaning, grain handling and residue management.
This course does not provide hands-on instruction, but explains how the various systems in a combine work together.
Once that is absorbed, the level 2 course tells students what to do to extract top performance from the combine.
Level 2 takes basic information gleaned from the first course and turns it into actual wrench-turning knowledge.
The aim is to develop the skills and techniques to optimize the performance of both the header and the combine.
Details on settings and adjustments are included with each functional system, along with tips on how to maximize capacity, performance and grain recovery.
Topics include travel speed, header settings, feeding, material distribution, threshing returns, sample quality, cleaning and assessment.
Renaud said the advanced course is unique.
“The industry’s first computer-based combine simulator allows you to change things like rotor speed, concave clearance and fan speed so you can clearly see on the screen how these functions affect overall performance.”
Renaud said throughout level 2, students are given in-depth theory to help achieve a better understanding of how a combine is engineered to function.
“I deliberately stayed away from putting our numbers into the course. This way it forces a guy to understand the theory, come up with his own numbers and plug them in to see what the result is on the screen. You’ve got to think about it and you’ve got to comprehend the theory.”
Renaud said it might take three or four hours to cover every screen, play with all the options, do the exercises and look at all the videos, but the result will be better combine performance.
“Farmers have a lot of money wrapped up in their combines. They want that machine to make as much money as it possibly can. This is one way to make the most of that investment.”
The two courses are available from Case IH dealers for $52 each.
They can also be ordered by calling 800-635-4913. Fundamentals of the Combine is #USMHAFA1C1EN. Combine Setting and Adjustments is
#USMHAFAZC4EN.


