Henry Guenter, now retired, is a former service manager for Massey Ferguson. He has compiled advice on how to better prepare combines for harvest.
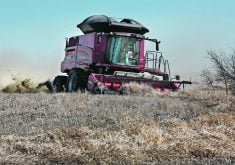
It will soon be time for farmers to drive their combines out of the shed. Here’s what they should be doing to make their machines field-ready so they don’t have to do it in the middle of harvest.
The check list that farmers use when getting their tractors ready in the spring – final drives, transmission, engine, wheels and filters – also applies when checking combines in July, but some items should have special attention.
Read Also

VIDEO: Ag in Motion documentary launches second season
The second season of the the Western Producer’s documentary series about Ag in Motion launched Oct. 8.
Wheel bolts
Combines become heavy with a full load of grain and the weight is constantly changing, which means it is important that the wheel bolts are tight. It is not enough to tighten them, drive the combine to the field and forget them.
Wheel manufacturers used to say they would like to see the wheel bolts tightened to the torque level recommended in the operator’s manual every hour for the first day and every day after that until the bolts won’t move when exposed to the pressure of the wrench. Then and only then will the bolts hold. Every bolt has stretch and it takes that long to get the stretch out of it.
I don’t recommend this procedure for everyone, but it is important to keep an eye on those bolts. If you go to your used combine right now, I would be surprised if you did not find loose bolts on the wheels.
Bearings
Nothing is more frustrating than a failed bearing one hour into harvest, but how can you tell when a bearing is going to fail?
- It might run hotter than the other bearings.
- The belts might run funny, jumping up and down a bit.
- You might hear a shudder.
- It will make a noise.
- A vibration analyzer can read any vibration on the combine, including bad bearings.
- A mechanic’s stethoscope can detect a cracked race or a chipped ball. If you decide to replace the bearing, do not put in extra grease.
Worn parts
When is it time to change wear items such as rub bars?
The cost of fuel and parts makes this an important issue because it takes more horsepower to thresh with worn parts than with new ones.
A general rule of thumb has been to replace them when they are halfway worn. Of course it depends where you measure.
On a conventional combine the sides might still be as good as new. You might have to change them sooner because you cannot get the proper setting to make the machine thresh properly.
If you are in a difficult crop you might look at the cage because a worn cage or concave will also use more horsepower.
Worn parts increase grain returns, and it takes a lot more horsepower to send grain through twice. The worn concave or cage is less aggressive and you start jamming the straw through rather then cutting it.
It is a judgment call. The parts will probably need to be replaced sooner if conditions are difficult, such as a lot of moisture in the crop.
A chain left on too long will start destroying the sprocket and should be changed when the worn links begin climbing up the tooth.
Belts wear out and need replacement, but it becomes expensive when they go too quickly.
A variable speed belt always takes abuse but shouldn’t need replacing too often. I once knew an operator who picked up a belt and returned within one hour for a second. It turned out he was using the wrong set of springs on his variator. The belts were too tight.
The variator is designed so that one pulley has to slide back and forth, which means it has some slop built into it. The result is that the pulley will not be at the same angle as the belt. As the pulley wears, this angle becomes greater and tears up the edge of the belt.
Farmers can make their own wear-gauge tool by bolting together two strips of metal long enough to fit down the depth of the sides of the pulley with a shorter piece in the shape of an H.
Lay the belt in the inside of the legs of the H and bend the strips so they take the angle of the belt.
Fit the tool inside the pulley. It should be at the same angle, plus or minus an eighth of an inch. Another way to measure is with the belt installed. Measure the difference between the tight and loose sides of the pulley. It should not be more than an eighth of an inch.
A combine’s cylinder drive often wears and its face has a bit of a step where the cylinder speed is run the most. This ridge will tear up a belt quickly.
Bum steer
Owners of older Massey Ferguson combines found they were hard to steer with a full tank of grain. This was true with the earlier single cylinder rear axle, but with the double cylinder rear axle, the problem was slow actuation.
They could speed it up by making the hole in the priority valve (that’s the long spool in the pump in front of the engine) a bit larger. Remember just a little bit because whatever additional hydraulic fluid flow is given to steering system must be taken from the header lift speed.