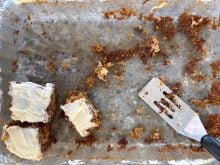

With British Columbia cherries in season, my daughter in Vancouver often finds she has bought more than she and her husband can eat fresh. When the fruit starts to get overripe, she bakes this dessert.
Cherry pudding cake
3 cups cherries, pitted 750 mL
(thaw if frozen)
1 cup flour 250 mL
1 teaspoon baking powder 5 mL
1/4 teaspoon salt 1 mL
3/4 cup sugar 185 mL
1/2 cup milk 125 mL
3 tablespoons unsalted butter, 45 mL
melted
1 teaspoon vanilla 5 mL
Read Also

Producer profits remain under significant pressure
Manitoba farmers are facing down a double hit of high input costs, like fertilizer, and low grain prices as they harvest their next crop.
1 tablespoon cornstarch 15 mL
3/4 cup sugar 185 mL
1 cup boiling water 250 mL
Preheat the oven to 350 F (180 C).
Place fruit in bottom of buttered nine inch (22 cm) square or round cake pan or casserole dish.
Combine the flour, baking powder, salt and the first 3/4 cup (185 mL) of sugar.
Add milk, butter, vanilla and beat until smooth.Spread batter over the cherries.
Combine remaining sugar and cornstarch and sprinkle over batter. Pour boiling water over mixture. Bake 45 minutes.
Yogurt making
Another way to use up fresh fruit is to blend fruit slices with yogurt, juice and ice cubes to make a smoothie, or use frozen fruit slices or pieces.
Dear TEAM – I need some help. Friends of mine are doing well with yogurt making. I am not sure what would be the danger zones. Their steps are to heat milk to just about the boiling point. Cool and culture and let sit in a warm place for eight hours.
Can we use store bought plain yogurt to start the project? Can culture be sour cream mix starts? What temperatures should be followed? What suggestions do you have for a recipe, with instructions? From D.P. by e-mail.
Dear D. P. – We received an electric yogurt maker as a gift many years ago and have made yogurt using a culture, as well as starting it from purchased plain yogurt. Both worked. But since you asked these questions, I did some research and came up with the following information.
You can use store-bought plain yogurt to start the project.
Although sour cream and yogurt can be alternatives for each other in preparing and cooking, I did not find any information that suggested that sour cream could be used as a starter for making yogurt.
Yogurt is a fermented milk product and is produced by adding a starter of active yogurt containing a mixed culture of bacteria that produce lactic acid during fermentation of lactose. The lactic acid lowers the acidity, makes it tart and causes the milk protein to thicken. The acidity also acts as a preservative since unhealthy bacteria cannot grow in acid conditions. The partial digestion of the milk when these bacteria ferment milk makes yogurt easily digestible. In addition, these bacteria will help settle gastrointestinal upset including following oral antibiotic therapy.
Several factors are crucial for successful yogurt making:
- Proper sterilization and cooling of the milk, proper cleansing and heat treatment of glassware and keeping out unwanted bacteria.
- Proper incubation temperature of 50 C (122 F) to inhibit the growth of unhealthy bacteria.
- Protection of the starter from contamination. Do not open the starter until you are ready to make the next batch.
Baked goods will rise well when yogurt is used, again due to its acidity. Use yogurt as part or all of the liquid in cakes, waffles, pancakes and muffins and reduce the amount of baking powder. The thickness of yogurt helps to hold up the baking batter.
Starter recipe
8 cups milk 2 L
1/2 cup plain yogurt 125 mL
Heat milk to 85-90 C (185-195 F) in a large double boiler. If using a heavy pot (2.5 quarts or 2-3 L), stir frequently to prevent sticking. Keep covered. Remove from heat, place covered pot in pan of clean cool water until stirred milk is 55 C (130 F).
Stir up yogurt starter with a clean fork, add to 55 C milk, stir thoroughly. The temperature should drop to 50 C (122 F). Pour the warm mixture into three 2 qt. (2 L) sized bottles plus a smaller 8 oz. (250 mL) jar. Cover immediately with lids sterilized in boiling water.
Place filled bottles in cooler, add enough 50 C (122 F) water so that bottles are surrounded, but the water is well below the lid rims. The starter jar will have to be placed on a support to keep its lid above the water.
Do not disturb the yogurt and it will be finished in three hours, provided the temperature does not drop below 40 C (104 F).
Refrigerate until needed.
For more firm yogurt, add two tablespoons powdered milk to the ½ gallon (2 L) of milk before heating. Either whole or skimmed milk may be used, but whole milk makes richer yogurt.
For more information, check the website at http://biology.clc.uc.edu/Fankhauser/cheese/yogurt_making/yogurt2000.html.
Harvest time recipes
It is harvest time and as in many other farm families, we all help out where we can. So today, I have been doing advance food preparation such as chopping up vegetables to freeze to save time on a more hectic day, and preparing meals and snacks.
The first thing I make every fall is my mother’s 30 day coleslaw with a fresh cabbage from their garden in the city.
Refrigerated coleslaw
1cabbage
1/2 cup green pepper 125 mL
(or red or yellow)
1/2 cup onion 125 mL
1/2 cup celery 125 mL
1/2 cup carrots 125 mL
Dressing:
2 cups white sugar 250 mL(I used Splenda)
1/2 cup vinegar 125 mL
2 teaspoons celery seed 10 mL
1/2 teaspoon dry mustard 2 mL
Chocolate clusters
11/2 cups chocolate chips 375 mL
1 cup butterscotch chips 250 mL
1/2 cup butter 125 mL
1/4 cup peanut butter 60 mL
2 cups chow mein noodles 500 mL
1 cup salted peanuts 250 mL
Mix chips, butter and peanut butter in large microwaveable bowl. Microwave on medium about four minutes or until melted and mixture is well blended, stirring after one minute.
Add noodles and peanuts and mix well. Drop tablespoonfuls of mixture in one inch (2.5 cm) mounds onto wax paper-covered baking sheets.
Refrigerate 30 minutes or until firm. Store in airtight container in the refrigerator.
Makes 36 clusters.
Potato baker bags
This is a great idea for those who enjoy oven-baked potatoes more than microwaved potatoes, yet are short of time.
This summer my friend, Barb, gave me three potato baker bags she had made for me and our daughters.
These bags do a better job of baking a potato in the microwave so when the potato is removed, it more closely resembles a potato baked in a conventional oven. The inside is well done, yet moist, with a tender exterior skin.
To use this bag, wash and dry one to four potatoes. Do not prick them. Wrap them in a paper towel and put them in the bag. Microwave as usual, about 10 minutes for four potatoes. Remember to read your microwave instruction manual, since you will not want to scorch or burn the bag.
To make the bag, you will need:
- Two pieces of 100 percent cotton fabric 10 x 22 inches (25 x 55 cm).
- One piece of 100 percent cotton quilt batting 10 x 22 inches (25 x 55 cm).
Optional: If you want to embroider a potato design on the top piece of plain fabric, you might centre it six inches (15.25 cm) down from the top of a 10 inch (24 cm) width edge. My friend used printed fabric, so did not embroider the bag.
- Place the two pieces of fabric with the right sides together, and place the batting on top. Pin the short 10 inch (25 cm) sides together.
- Sew a 1/2 inch (1.25 cm) seam along the top and bottom 10 inch (25 cm) sides with right sides together.
- Turn right side out. Then top stitch at the top and bottom.
- Place on table with the inside of the bag facing up.
- Place a mark two inches (five cm) down from the top of one edge and fold the bag up to that mark.
- Fold the two inches (five cm) over the top and pin.
- Pin the two inch (five cm) lip through the front part only, so you can turn it.
- With the lip pinned in place, turn the bag inside out.
- Pin together along the sides and stitch them together. This two inch (five cm) lip is inside when pinned, almost like an envelope with the flap inside.
- Serge edges if desired.
- Turn bag right side out. Turn the two inch (five cm) lip over to the front side of the bag so it is right side out.
- Insert your potatoes and bake according to microwave instructions.
Barbara Sanderson is a home economist from Rosetown, Sask., and one of four columnists comprising Team Resources. Send correspondence in care of this newspaper, Box 2500, Saskatoon, Sask., S7K 2C4 or contact them at team@producer.com.